Adding rules will help you with the automatic classification of your Income & Expenses.
It will save you time over manually classifying transactions that you regularly make.
Maybe you always buy your work tools from a particular DIY store? Simply add a keyword rule and your past and future transactions will be classified under business.
What about if you want to classify items over or under a certain amount?
Well let’s see how it’s done…
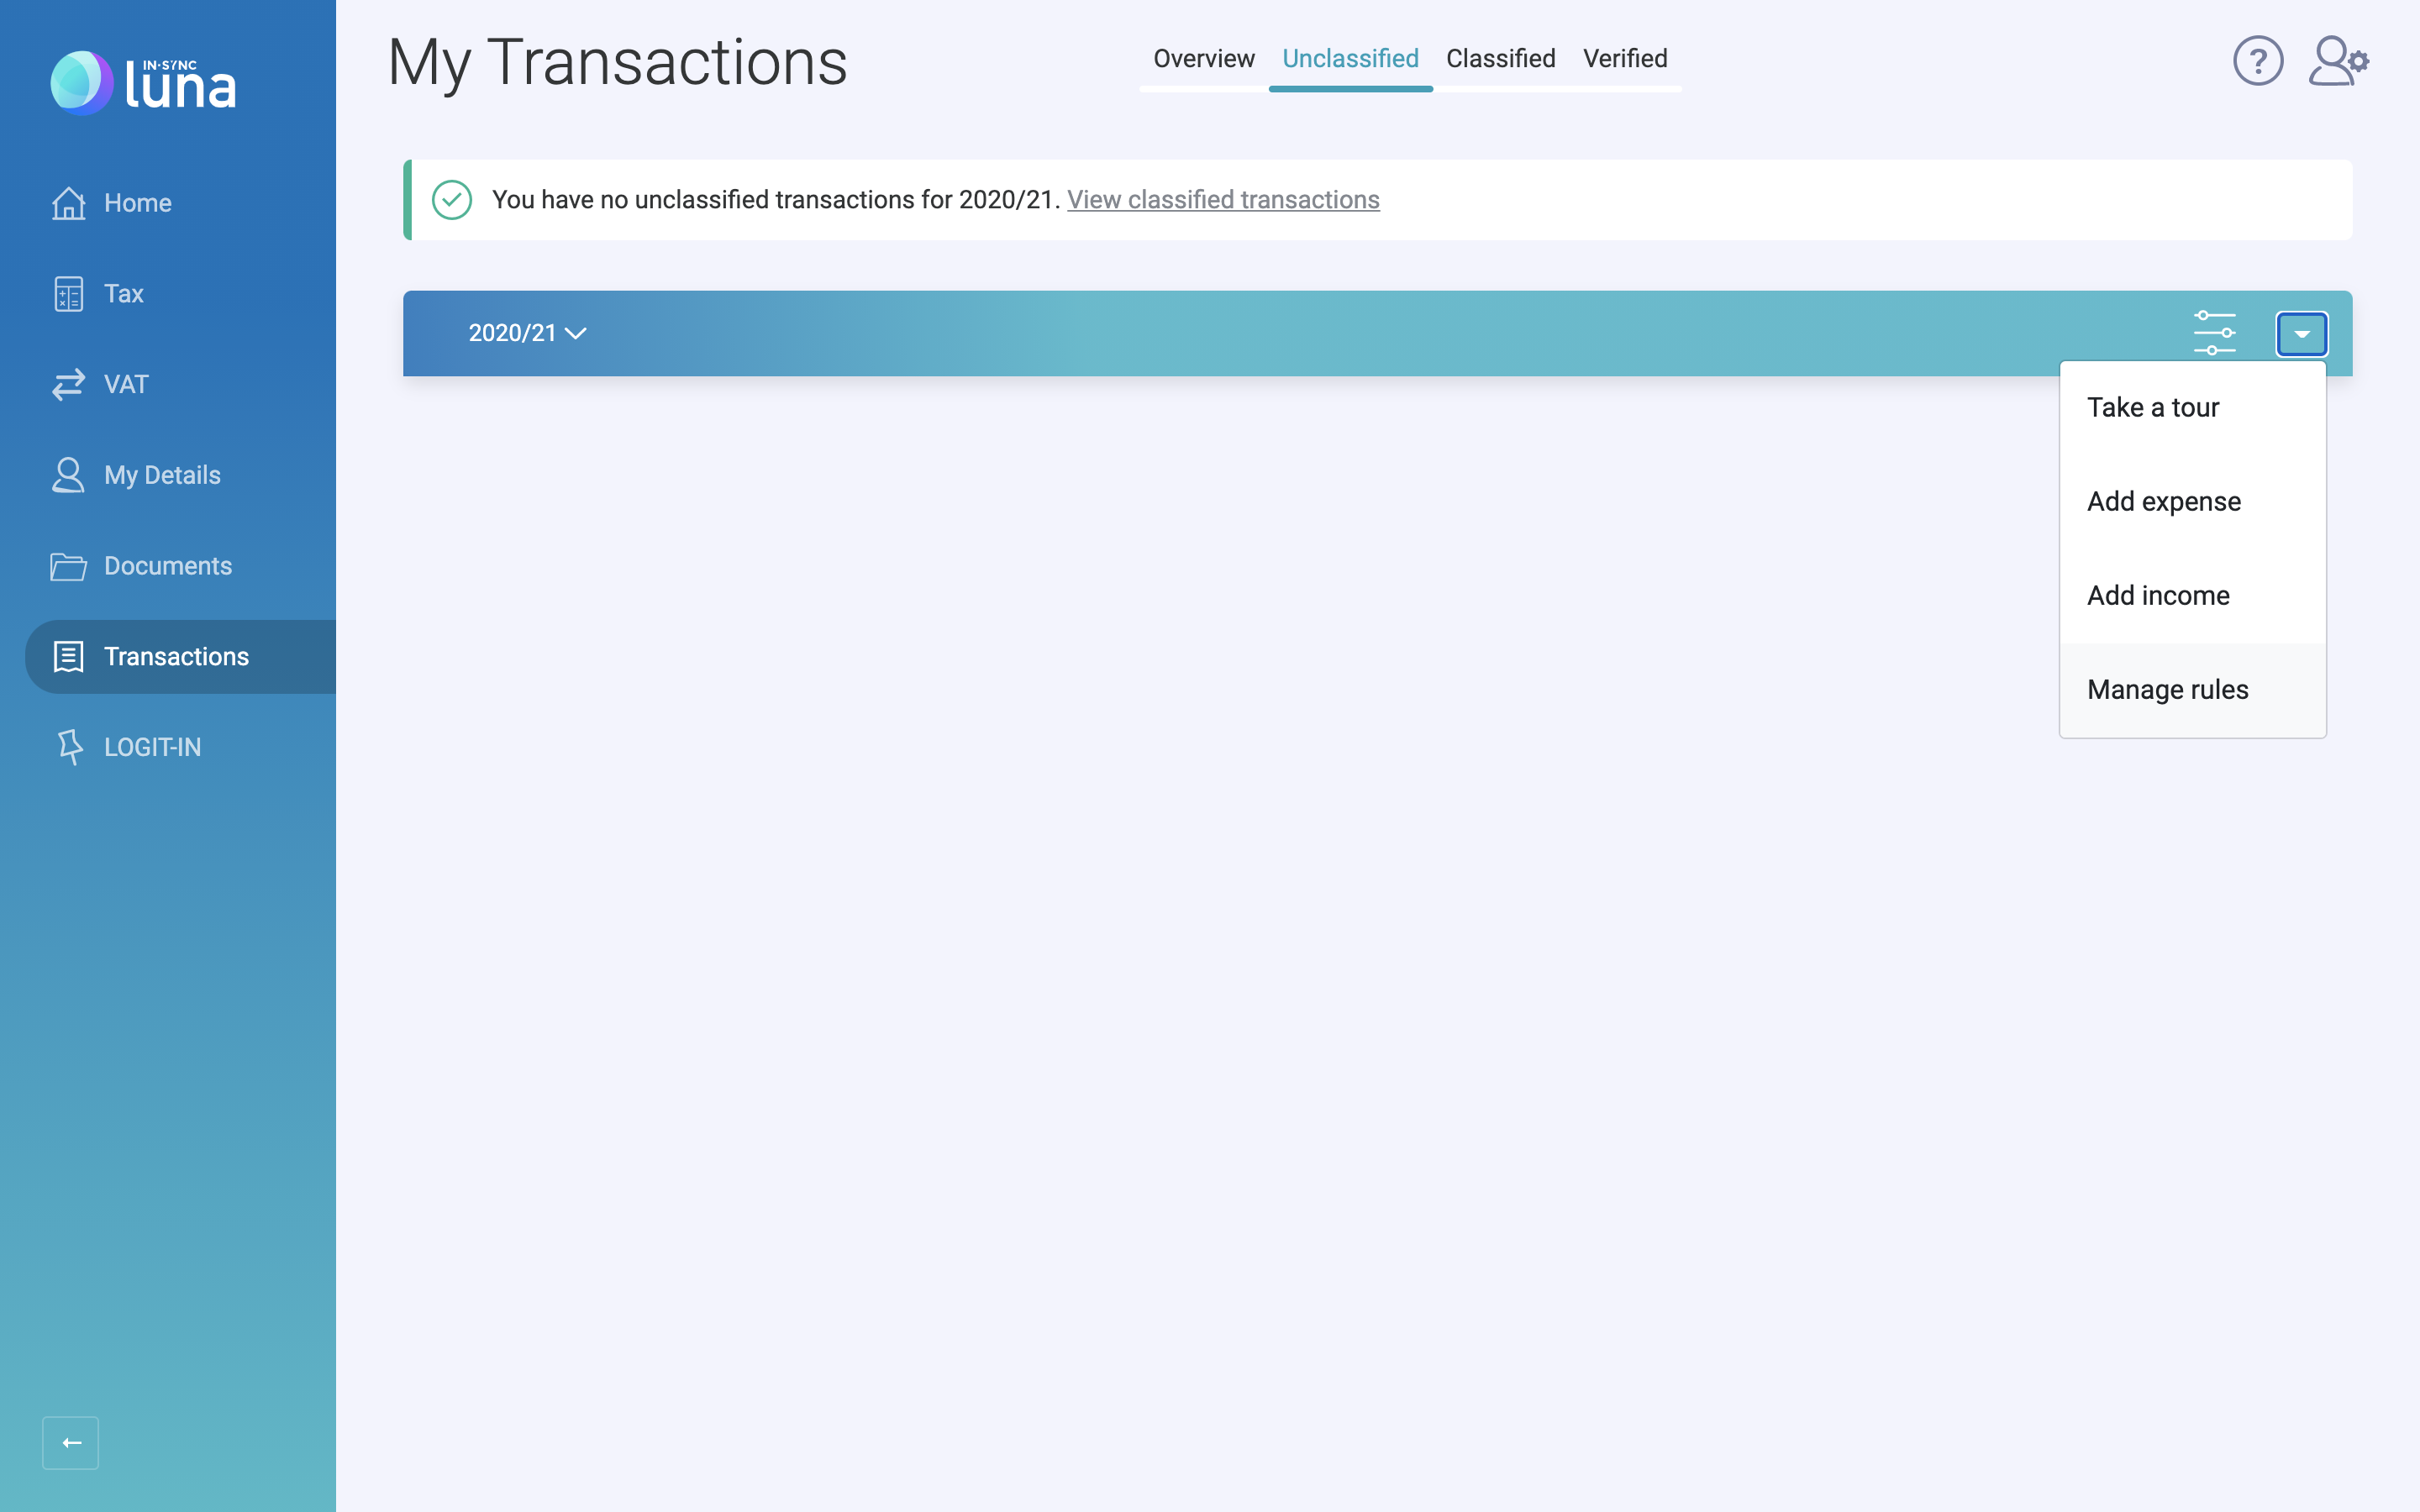
From the drop down on the 'Unclassified' or 'Classified' transactions screen select 'Manage Rules'. You can also access the 'Rules' section by visiting Settings or 'My Details'.

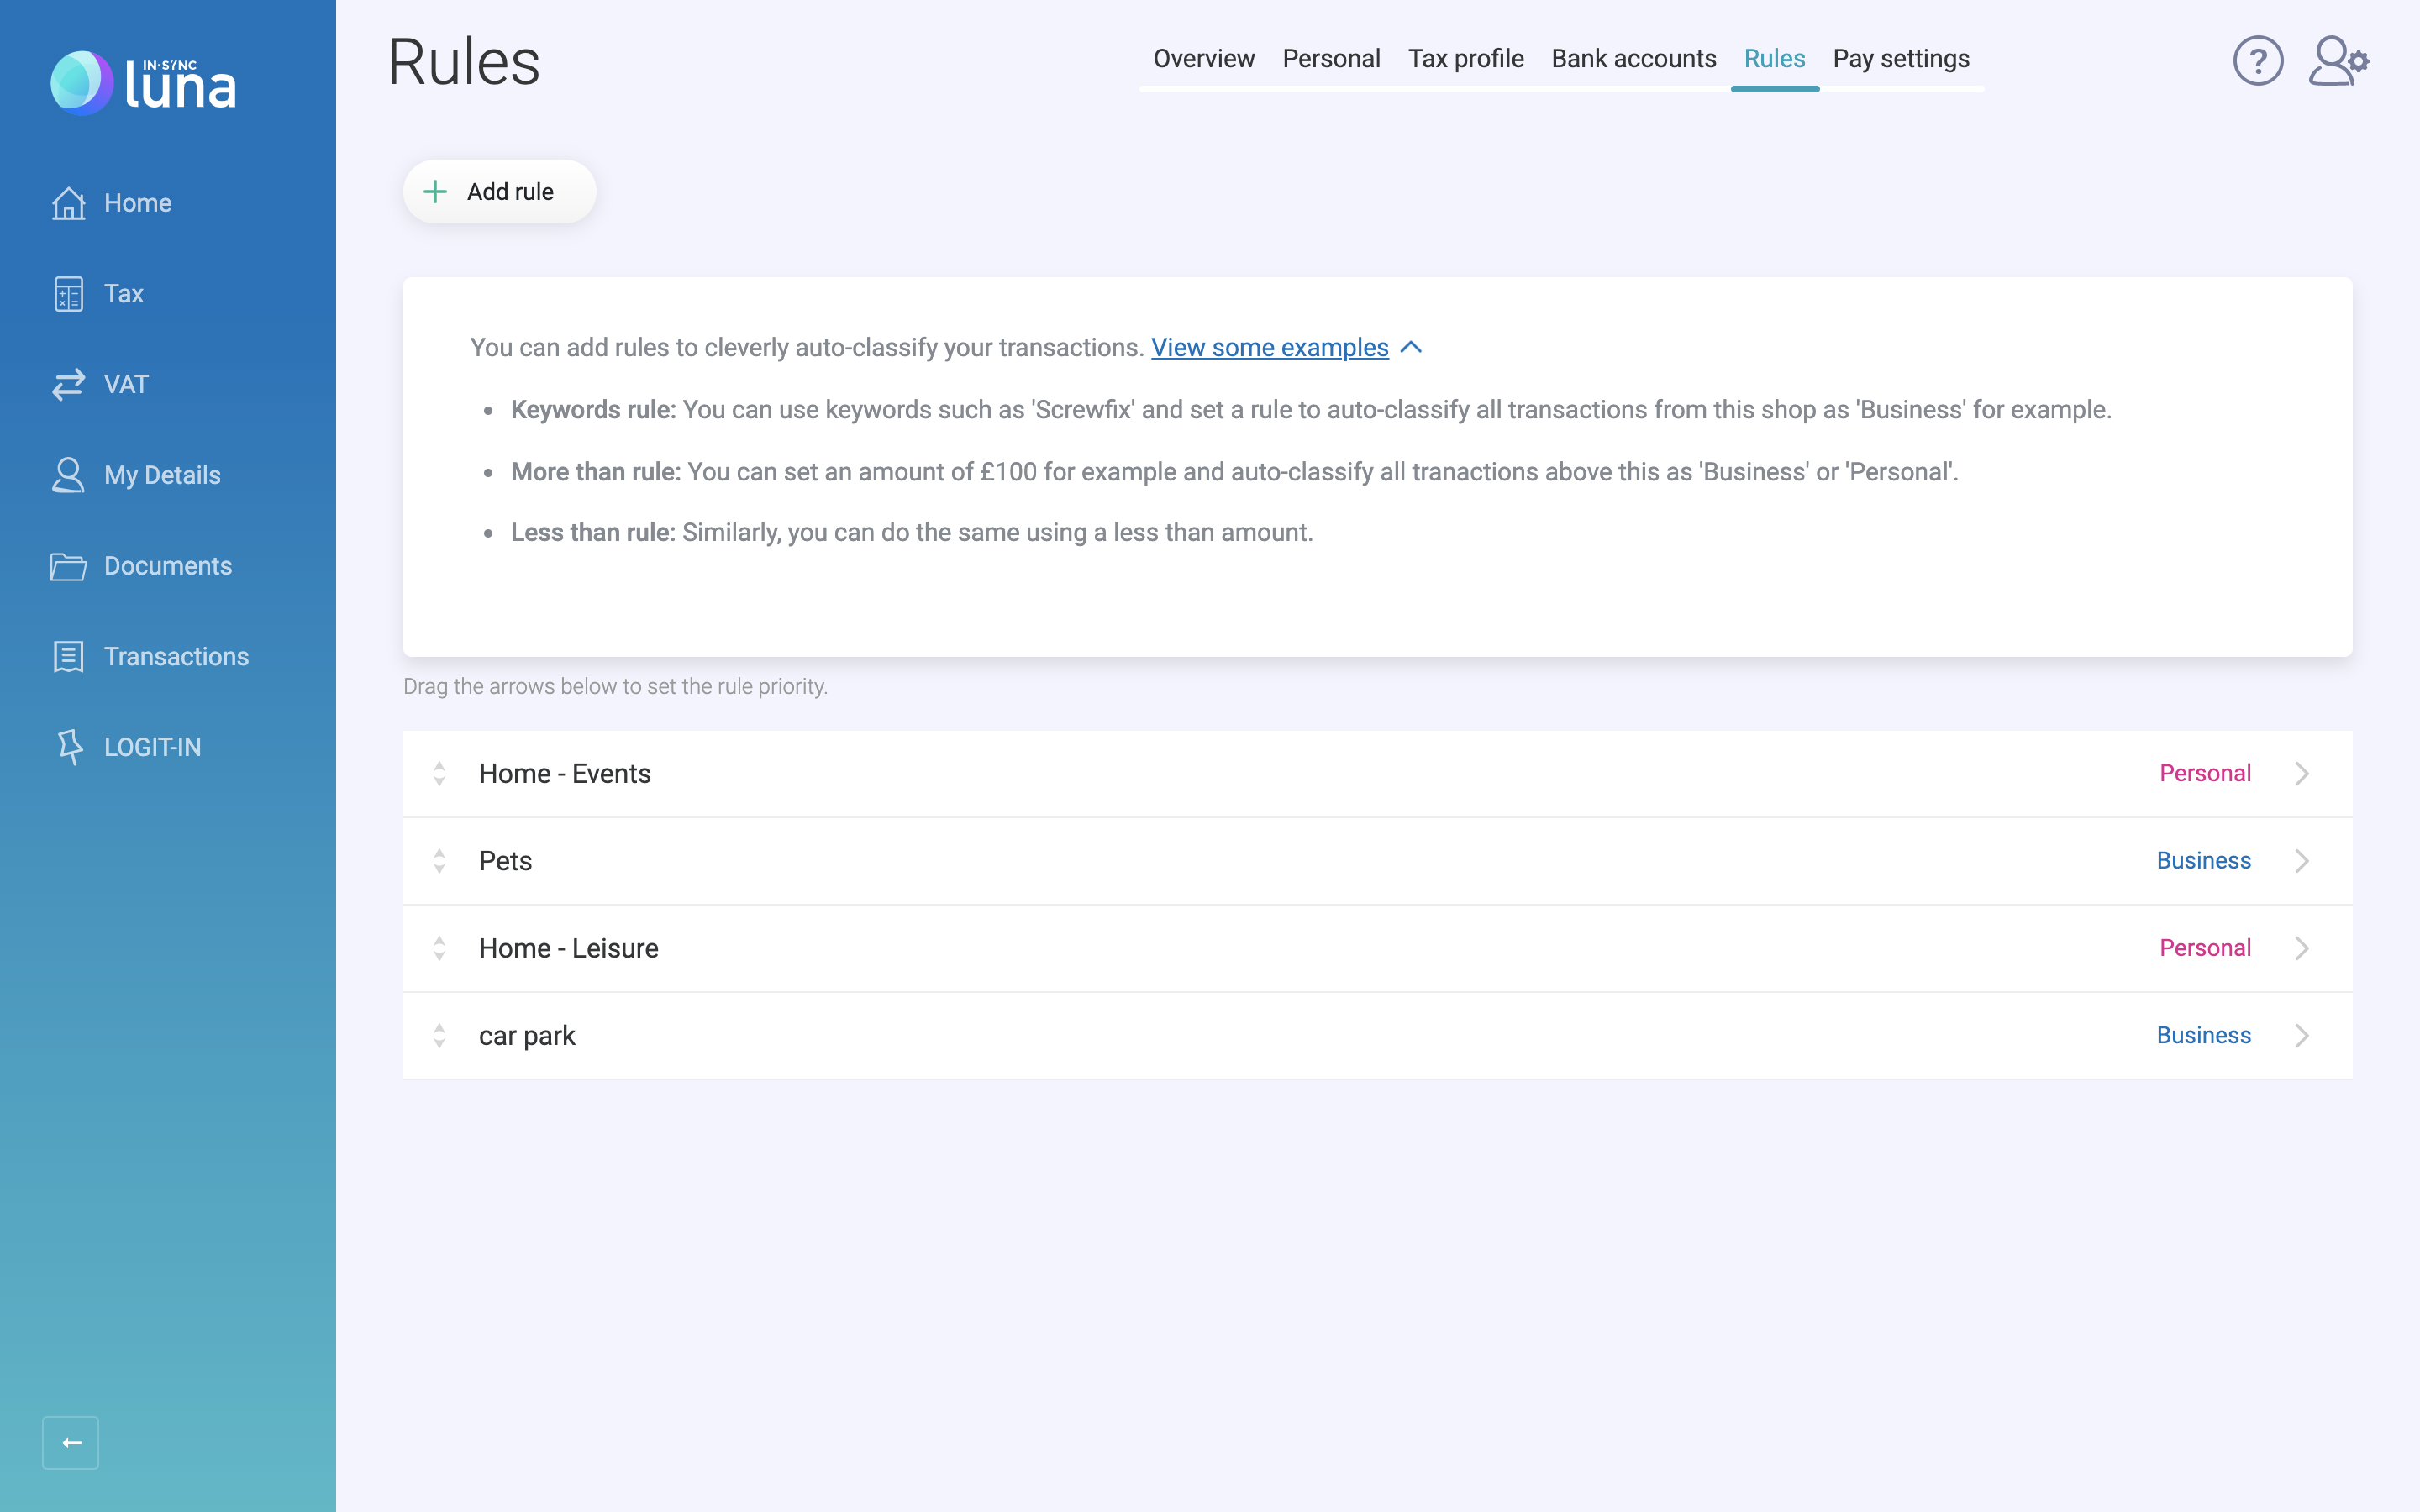
The next screen you see will be your 'Rules' screen. Here you can see all active rules and add any new ones you wish to.

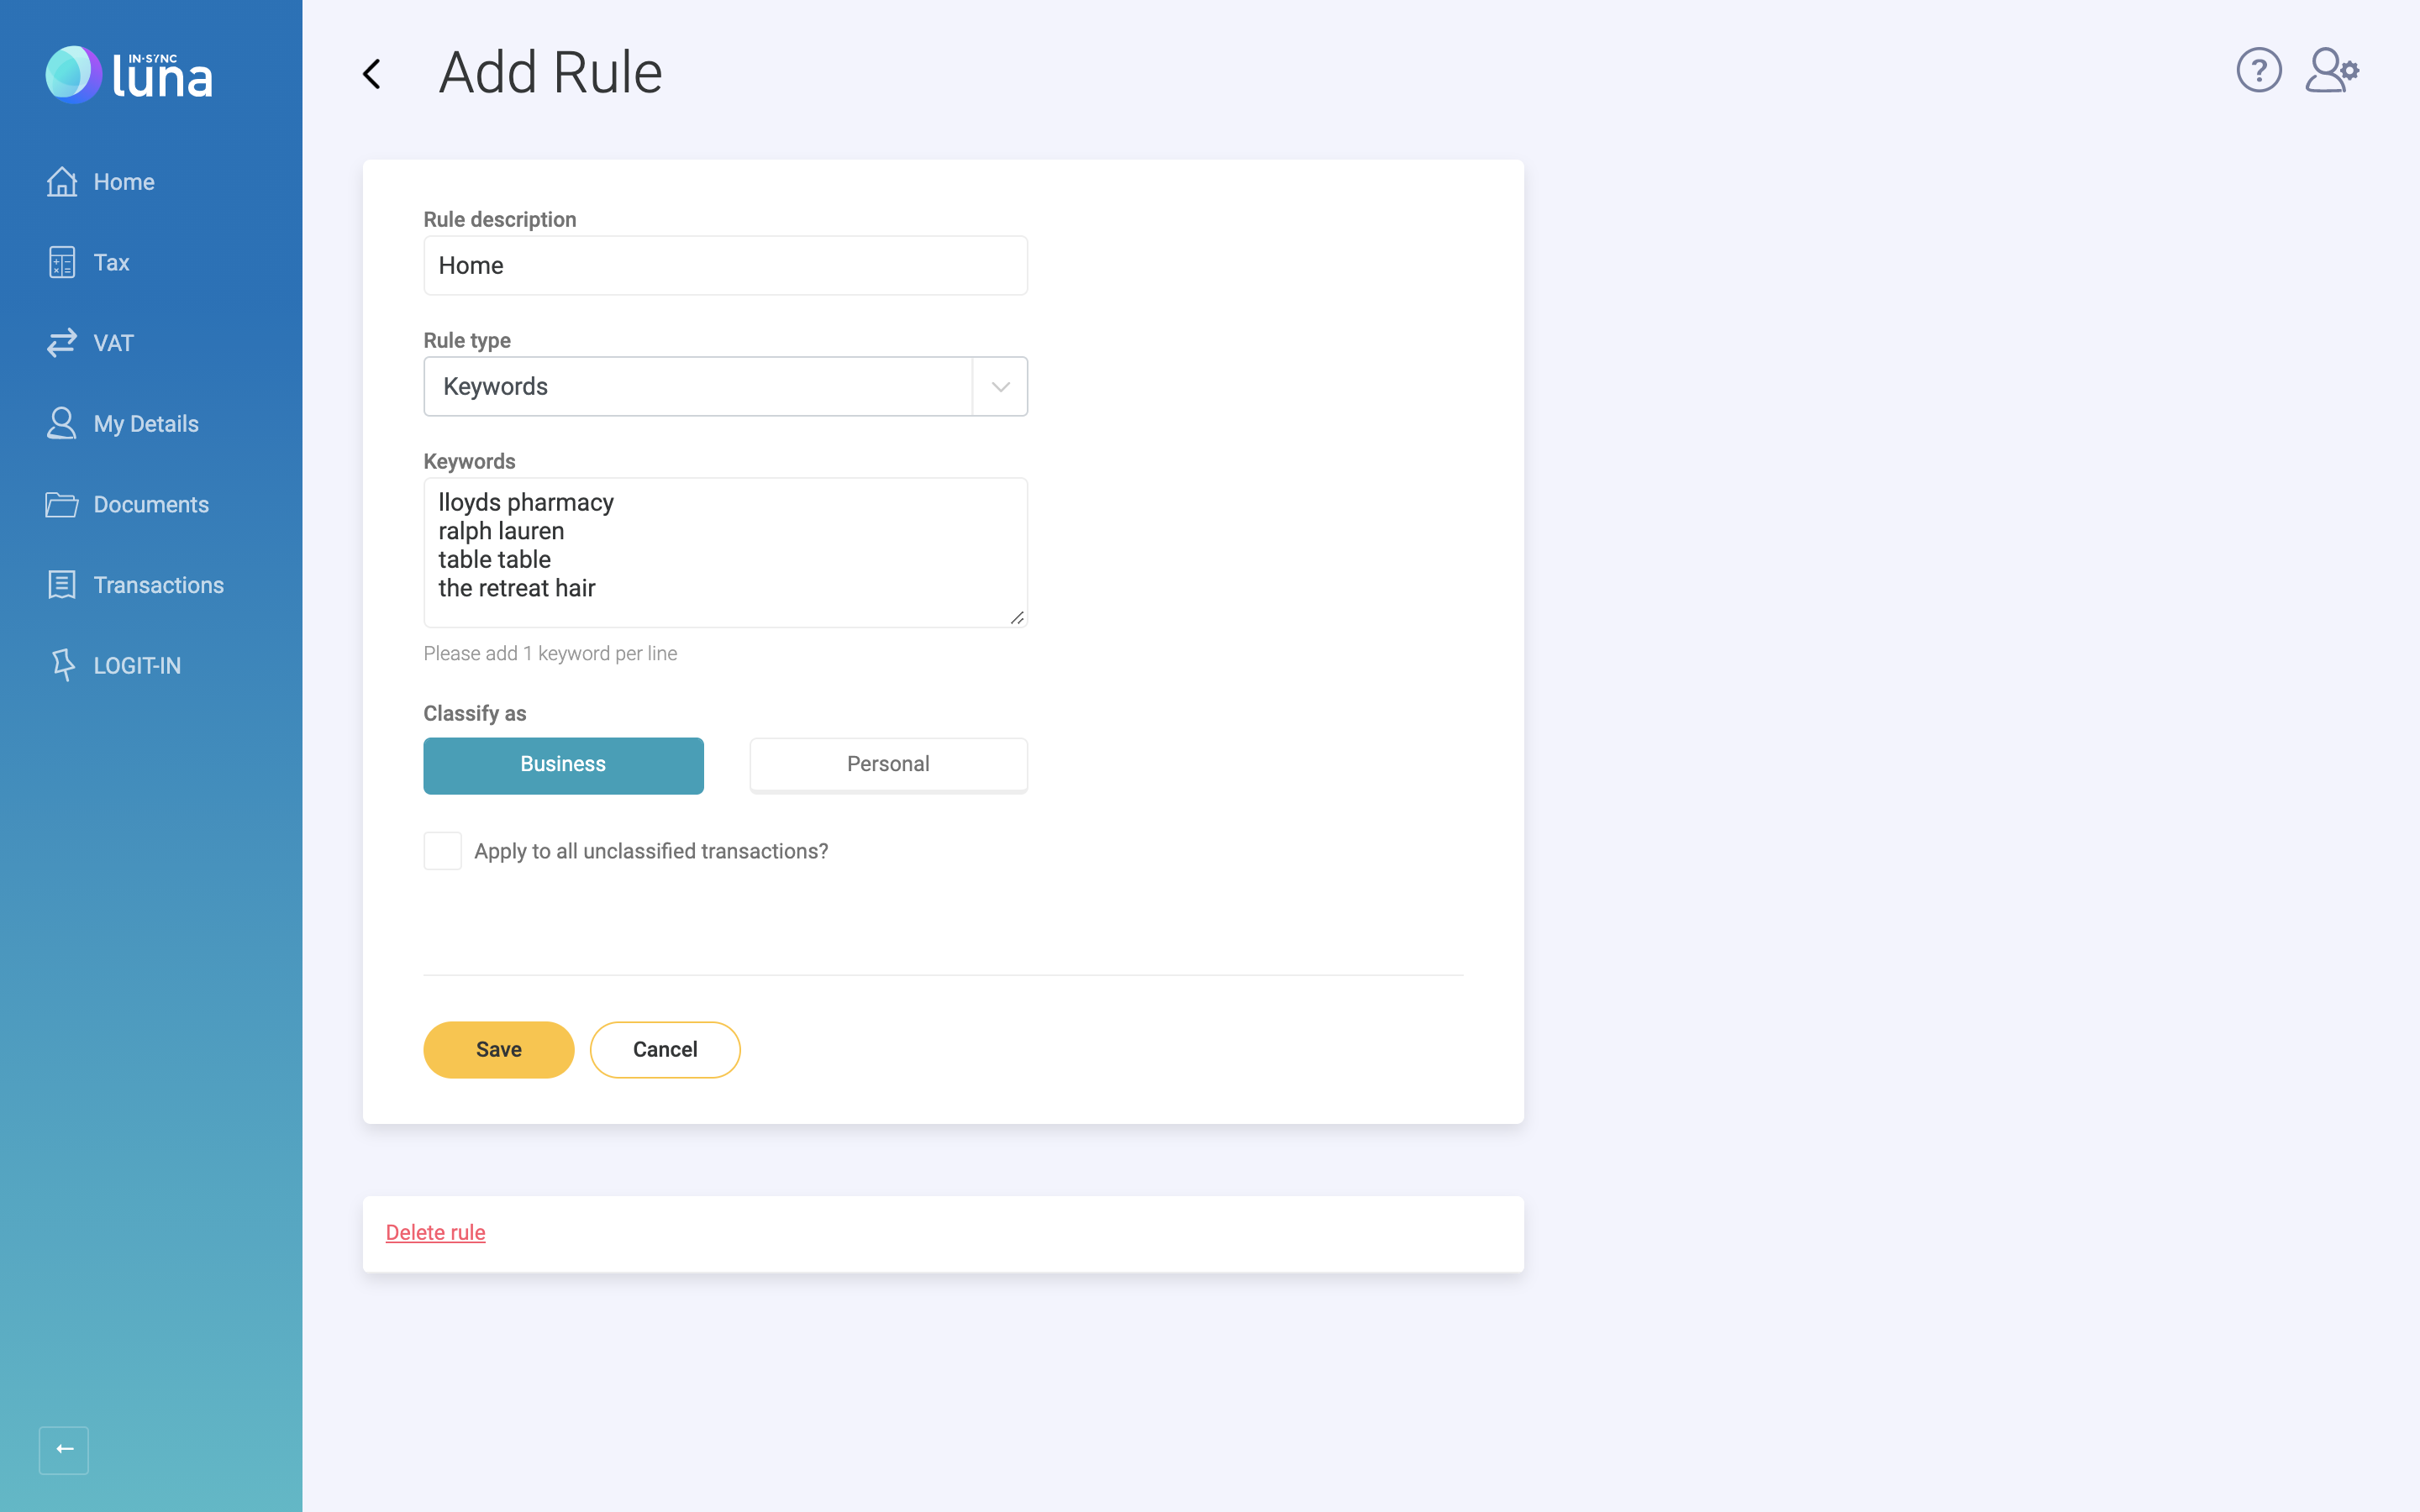
When adding a new rule you will need to give a description so later on you can see the reason why a transaction has been classified.
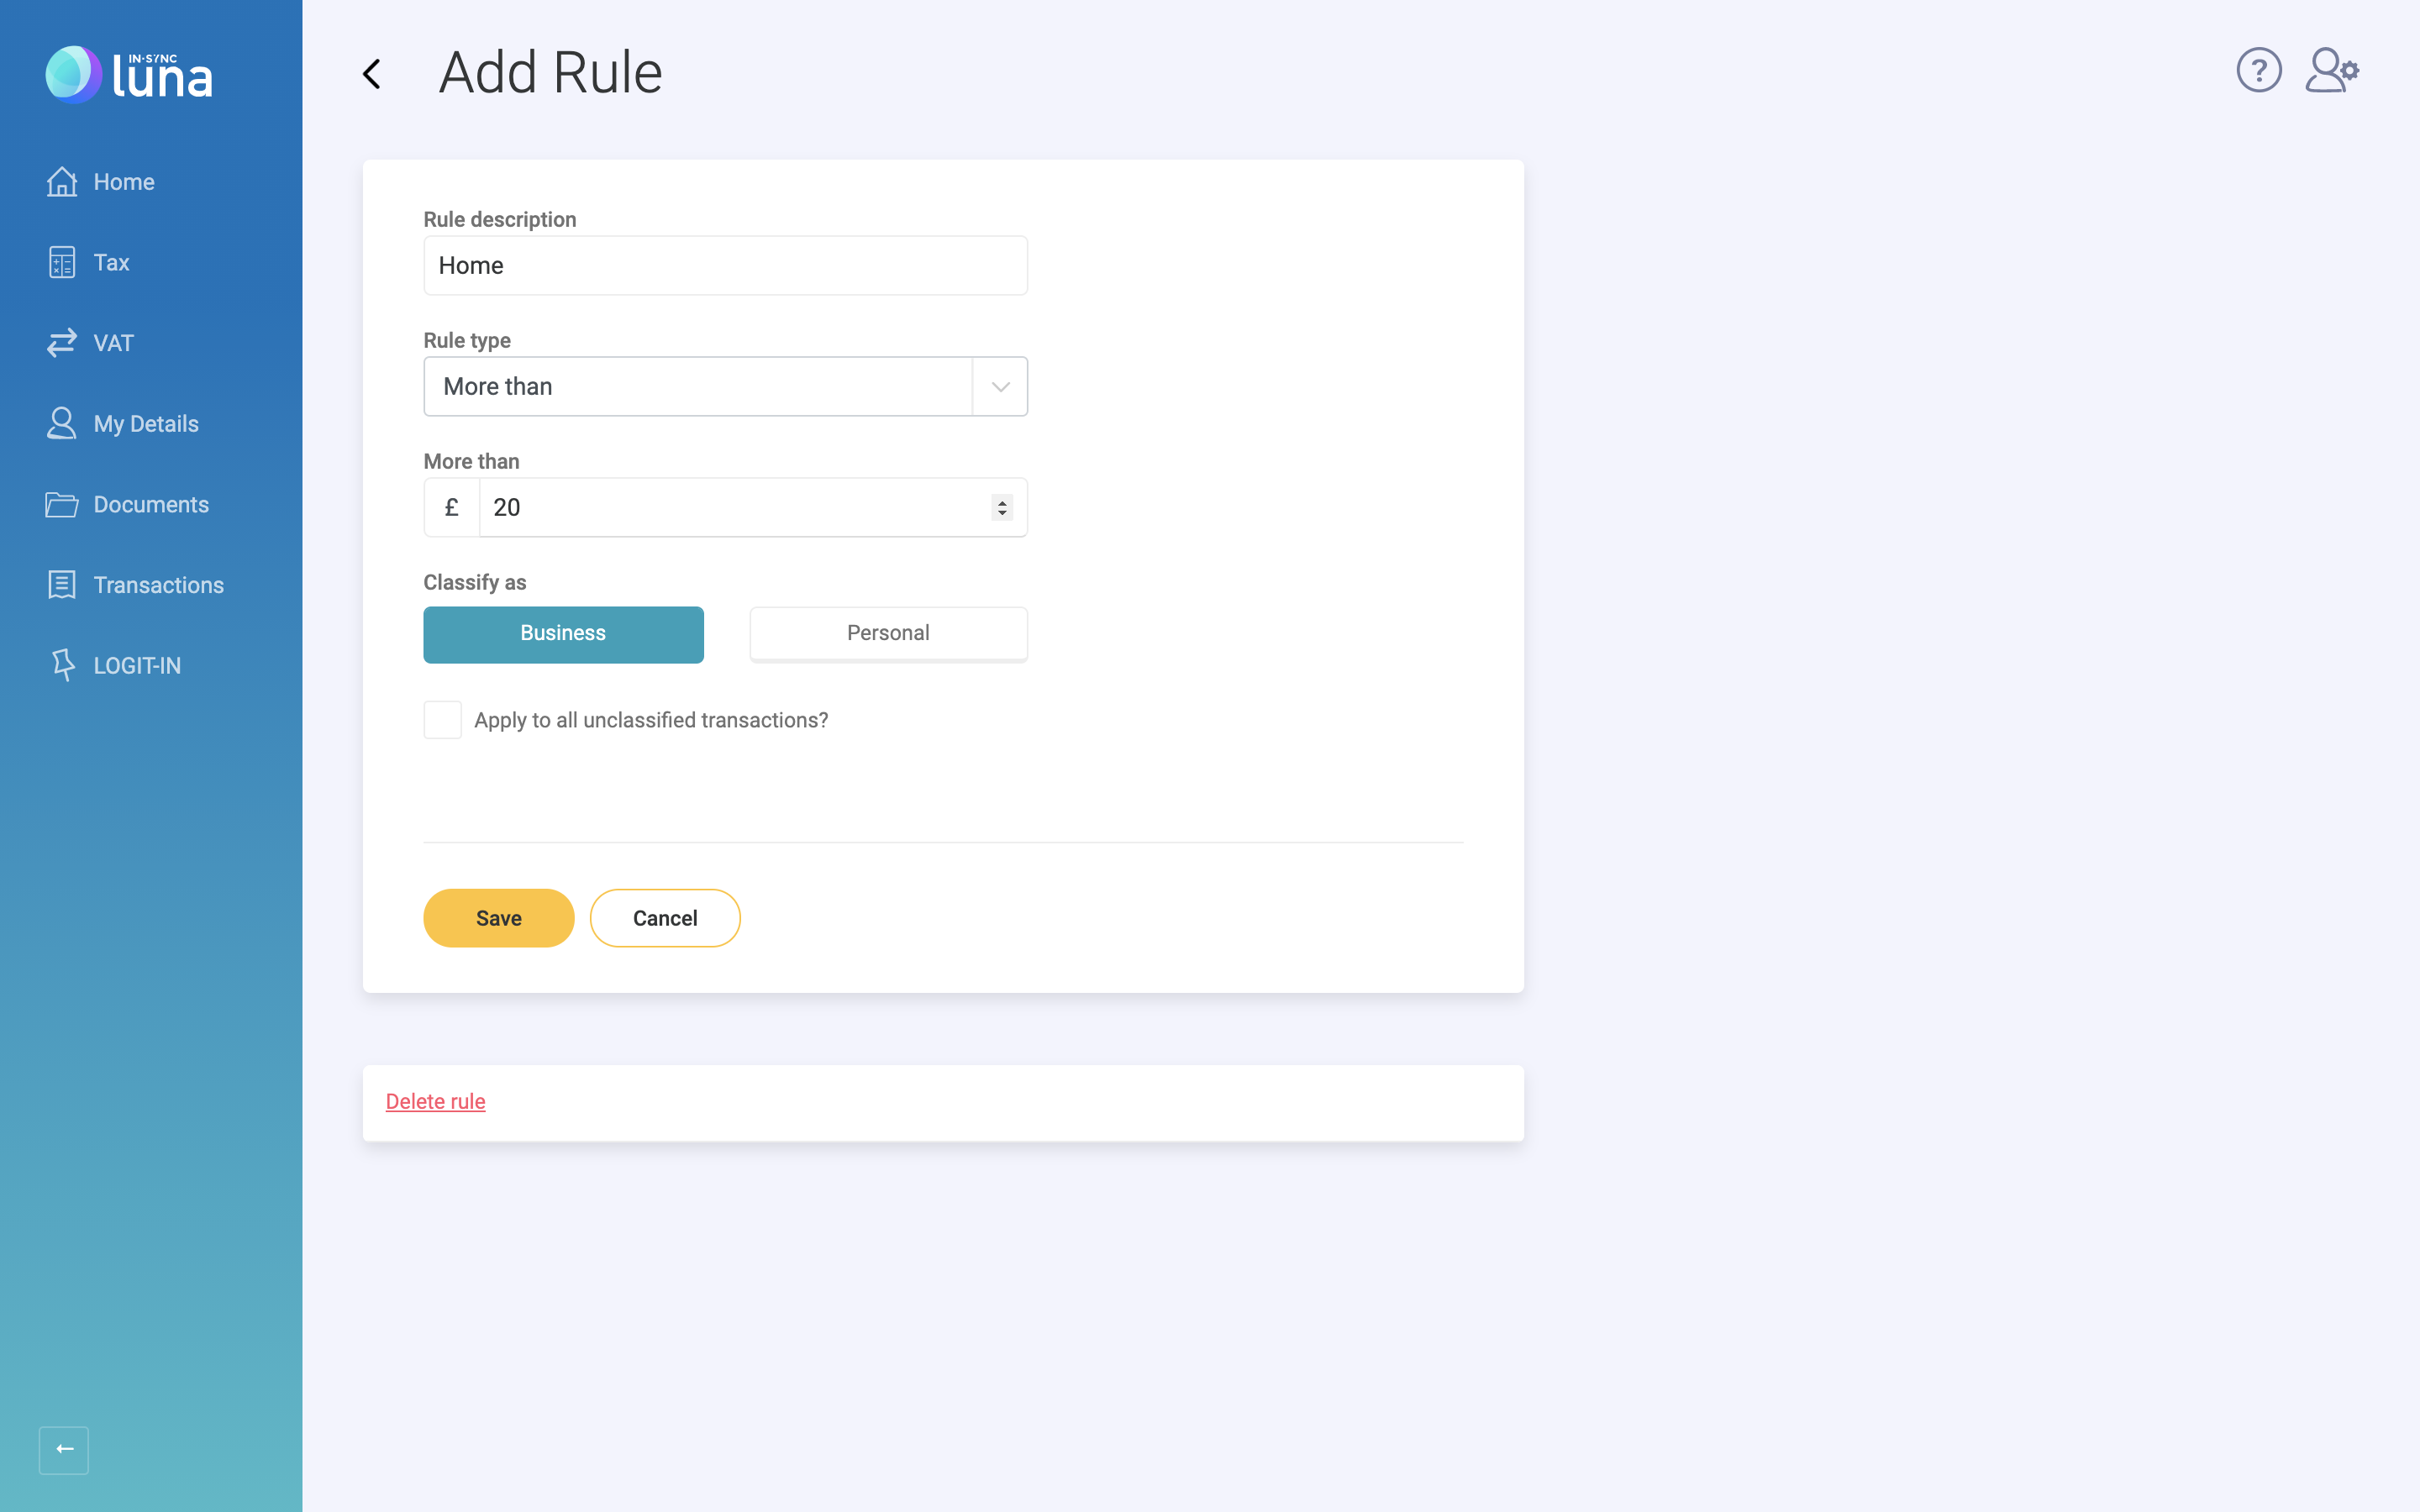
Next, choose a rule type:
For a keyword rule you might want to have a “grocery shopping rule”. You can add Tesco, Asda, Lidl and Aldi as keywords. Then you can then choose to classify these purchases as personal or business.

Use 'More Than' to add anything more than a certain amount. An example being anything more than £20 would be a business expense, or classify small expenses under £5 as personal expenses.

Your rules can be applied to all unclassified transactions.
Finally click save and the rules will be applied.
You also have the option of reordering your rules in order of priority. For example, you may have everything under £5 as a personal expense but perhaps anything from your favourite DIY store still gets classified as a business expense even if it falls under £5.
When you go to the classified expenses section in Transactions you will see a rule icon next to each transaction that has a rule applied to it.
![]()
Now you can get on with what you do best, knowing that behind the scenes, Luna is doing the work for you and saving you time.